I lead the program last night at our monthly calligraphic meeting. this years theme is "26 letters" and I have taken that theme a bit further by adding "letters" or snail mail. I have the honour of organizing the programs for the year with various ideas on how to decorate an envelope. there will be a variety of instructors to come who will share their unique take on "letters" or "snail mail". we are hoping that this will spread our art of lettering throughout the community and encourage members to spruce up their mailings. with all the technology lately it seems like no one sends mail like we used to. how wonderful would it be to find a lovely decorated envelope in your mailbox? I wanted to share with you what I lead the members with last night.
I took some circle punches and created stencils to use. then I locked myself in the studio with the stencils, pencil crayons and let my mind play with different ideas for circles.
the first idea I had was to draw a fine wavy line down the left hand side of the envelope. pick a couple of colors and draw two more wavy lines. then taking one of the circle stencils I used half of the circle to create a design.
remember spirograph? that is what came to mind when I started layering the circles into a flower type shape. you could add more circle flowers and stems too!
next I created a scallop border all around the edge of the envelope using half of the circle stencil and alternating colours.
the next idea was quite simple. three circles on the left hand side of the envelope. I used primary colours, but then thought it would be fun to create a "traffic light" design too.
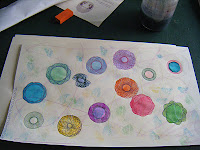
how about polka dots all over the envelope? you could do an assortment of colours and add some metallic touches here and there.
then I stopped to grab a cup of tea and saw the honeycomb pattern on the side of honey bottle. hey! so honeycomb pattern it is.
and my favourite thing is to create colour wheels. I use them in my journals and art pieces quite a bit so I grabbed the big circle stencil and slid it around a bit to give it an imperfect look. then just quickly drew the divisions and filled in the colours. my sample went missing but here is a colour wheel I did in my journal awhile back.
now some of us like the more structured designs and so using the same idea as the wavy half circle I created half circle stripes.
and finally I thought how about using circles as outlines for the letters of the name of the person you are sending it to?
and for the lettering use your own printed letters and add circles!
with all these ideas in mind the members are encouraged to come up with some more ideas, decorate an envelope and send into the society for display at our next meeting.
go grab your circles, pencil crayons and play! I would love to see what you come up with!


